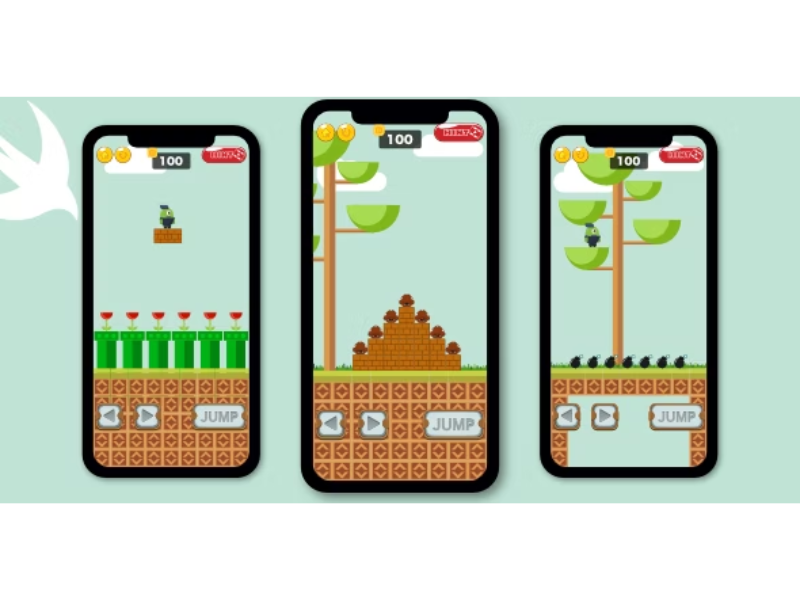
SpriteKit programming is a game-changer in the world of 2D game development and animation. With its powerful features and intuitive interface, SpriteKit empowers developers to bring their imaginative ideas to life. Whether you are a seasoned game developer or a beginner with a desire to create engaging visual experiences, SpriteKit programming offers a wide array of tools and techniques to make your dreams a reality.

In this comprehensive guide, we will dive deep into the world of SpriteKit programming, exploring its features, best practices, and tips to help you unlock your full creative potential. From understanding the basics of SpriteKit to advanced animation techniques, this article will serve as your go-to resource for mastering SpriteKit programming. So, let’s embark on this exciting journey and discover the endless possibilities that SpriteKit has to offer!
SpriteKit Programming: The Basics

Before diving into the intricacies of SpriteKit programming, let’s lay a solid foundation by understanding the basics. In this section, we will explore the fundamental concepts and components of SpriteKit.
What is SpriteKit Programming?
SpriteKit programming is a powerful framework developed by Apple for creating 2D games and animations. Built on top of the iOS and macOS frameworks, SpriteKit provides developers with a wide range of tools and resources to build visually stunning games with ease. It simplifies the process of rendering graphics, handling animations, managing scenes, and handling user interactions, allowing developers to focus on creativity rather than technical complexities.
Key Features of SpriteKit Programming
- Scene Management: SpriteKit provides a scene-based architecture, allowing developers to manage different scenes and transitions seamlessly.
- Physics Simulation: SpriteKit simplifies physics simulation by providing a built-in physics engine, enabling realistic movements and interactions between game objects.
- Texture and Asset Management: With SpriteKit, developers can easily import and manage assets, such as images, sounds, and particle effects.
- Animation and Particle Systems: SpriteKit offers a robust animation system, supporting both frame-based animations and property-based animations. It also provides particle systems for creating complex visual effects.
- Built-in Audio Support: SpriteKit comes with built-in audio support, allowing developers to add immersive sound effects and music to their games.
- Integration with Other iOS/macOS Technologies: SpriteKit seamlessly integrates with other iOS and macOS frameworks, enabling developers to leverage the power of technologies like Metal and Core Animation.
Setting Up SpriteKit Programming Environment
To start your journey with SpriteKit programming, you need to set up your development environment. Here’s a step-by-step guide:
- Install Xcode: Xcode is the official IDE for iOS and macOS development. Download and install Xcode from the Mac App Store or the Apple Developer website.
- Create a New Project: Open Xcode and create a new project. Choose iOS or macOS as the target platform, depending on your requirements.
- Choose SpriteKit Template: In the project creation wizard, select the SpriteKit template as the project type. This template provides a basic structure for starting your SpriteKit project.
- Configure Project Settings: Set the project name, organization identifier, and other necessary settings as per your requirements.
- Build and Run: Once the project is created, build and run the project to ensure everything is set up correctly.
With your development environment ready, you are now all set to dive into the exciting world of SpriteKit programming!
Advanced SpriteKit Techniques

Now that we have covered the basics of SpriteKit programming, let’s explore some advanced techniques to level up your game development skills. In this section, we will delve into advanced animation, physics simulation, and optimization techniques to enhance the visual appeal and performance of your games.
Creating Complex Animations with Actions
SpriteKit provides a powerful set of actions that allow developers to create complex animations with ease. Actions are pre-defined behaviors that can be applied to nodes within a scene. By combining and sequencing actions, developers can achieve lifelike animations that bring their games to life.
The SKAction class provides a wide range of actions, including movement, scaling, rotation, fading, and more. Here’s an example of how to animate a sprite’s movement using actions:
swift let moveAction = SKAction.move(by: CGVector(dx: 100, dy: 0), duration: 2.0) sprite.run(moveAction)
Using actions, developers can create intricate animation sequences that respond to user interactions or game events. This adds a layer of interactivity and immersion to the overall gaming experience.
Simulating Realistic Physics Interactions
Physics simulation is a fundamental aspect of game development, as it enables objects to interact with each other in a realistic manner. SpriteKit simplifies physics simulation by providing a built-in physics engine that handles collision detection, gravity, forces, and more.
To enable physics simulation for a node, you need to assign a SKPhysicsBody object to it. Here’s an example of how to create a physics body for a sprite:
swift let spriteNode = SKSpriteNode(imageNamed: "sprite") spriteNode.physicsBody = SKPhysicsBody(rectangleOf: spriteNode.size) spriteNode.physicsBody?.affectedByGravity = true
Once a physics body is assigned to a node, you can apply forces, impulses, and collisions to create realistic physics interactions within your game.
Optimizing Performance with SpriteKit
Efficient performance is crucial for delivering a smooth and immersive gaming experience. Here are a few tips to optimize the performance of your SpriteKit games:
- Sprite and Texture Management: Minimize the number of sprites and textures rendered on the screen to reduce the GPU load. Utilize sprite atlases to group multiple images into a single texture.
- Batch Node Usage: Use
SKSpriteBatchNodeto batch multiple sprites together for efficient rendering. - Texture Compression: Compress your textures using formats like PVRTC or ASTC to reduce memory usage and improve performance.
- Node Hierarchy Optimization: Organize your scene hierarchy efficiently by minimizing the number of nested nodes and nested actions.
- Asynchronous Loading: Load heavy game assets asynchronously to prevent the UI from freezing during loading screens.
By implementing these optimization techniques, you can ensure that your SpriteKit games run smoothly on a wide range of devices, providing an enjoyable gaming experience to your users.
FAQs
Q: Is SpriteKit programming only for iOS development? No, SpriteKit programming can be used for both iOS and macOS development. It is a versatile framework that allows developers to build 2D games and animations on multiple Apple platforms.
Q: Can I use SpriteKit programming with other game engines? Yes, you can integrate SpriteKit programming with other game engines, such as Unity or Unreal Engine, to leverage its powerful features for 2D graphics and animations.
Q: Is SpriteKit suitable for beginners in game development? Absolutely! SpriteKit programming offers a beginner-friendly interface and a wide range of resources, making it an excellent choice for newcomers to game development. With SpriteKit, you can start creating captivating games without prior experience in programming or game development.
Q: Are there any limitations to SpriteKit programming? While SpriteKit is a versatile framework, it does have a few limitations. For instance, it is primarily focused on 2D game development and lacks extensive 3D capabilities. If you require advanced 3D graphics or complex physics simulations, you may need to consider other game engines specifically designed for those purposes.
Conclusion
SpriteKit programming opens a world of endless possibilities for game developers and animation enthusiasts. With its user-friendly interface, powerful features, and seamless integration with iOS and macOS platforms, SpriteKit empowers individuals to unleash their creativity and bring their unique concepts to life.
In this comprehensive guide, we have explored the basics of SpriteKit programming, advanced techniques for animation and physics simulation, and optimization tips to ensure smooth performance. Armed with this knowledge, you are now ready to embark on your own SpriteKit programming journey.
So, get your creative gears running, dive into the fascinating world of SpriteKit programming, and create captivating games that will engage and entertain players around the globe. Happy coding!